Template Highlights
- Suitable for office printing
- Fully customisable
- Colour / black & white print

About this Template
5S red tags are used to identify and sort necessary items, equipment and materials during the Sort phase of a 5S workplace organisation project.
Use our ready-made design or customise to your needs. Read our comprehensive guide below to get started.
Learn more about 5S in our free 5S course.
Print Instructions
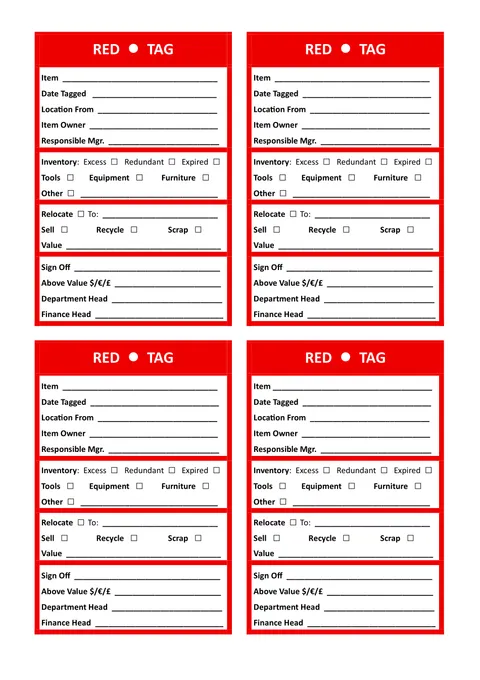
- It's recommended to print on thick paper or card.
- For colour printing use white A4 / U.S. letter paper.
- For black-and-white use red paper.
- Cut out the printed tags with a guillotine or scissors
- Carefully punch out a hole in the top with a hole punch or pencil.
Printing Quickstart
Download one of our ready-to-print PDF files.
Customising the Template
Open the Google Doc, or download the Microsoft Word .docx template to customise the template to your requirements.
How to Use 5S Red Tags
Define the Project Scope and Team
It is important to define the scope or boundary of each 5S initiative. It should have a team focus with an identified team leader and should involve everyone who works within the designated scope.
The leader of the initiative should identify the local owner or manager of the workplace as the sponsor of the 5S initiative and have their full agreement to support and recognise the efforts of the team. Leadership interest is the greatest factor that influences success in 5S.
If multiple teams are occupying the workplace, it is best to split them into individual 5S projects with separate 5S team leaders. The natural competition that this evokes is highly beneficial to the overall success.
Designate Red Tag Areas
It is helpful to remove all red-tagged items to a separate red tag area. Removing items for later review allows the 5S process to continue more easily.
The areas set aside for red-tagged items should be accessible and allocated to a single team with separate locations, ideally with one area for materials & inventory and another for tools.
The team will continue to own these items until their disposal or reallocation is agreed upon. They may continue their next 5S process steps while they seek approval from the responsible authority for disposal.
While for most items it should be possible to agree on disposal within a month, there may be a six-month or longer time limit on a final decision.
Categorise Items in the Workplace
Junk
The first category of items to identify is any item, materials, tools or equipment that is rubbish or scrap that has no use or value. They can be immediately recycled or thrown away as they need no further consideration.
Materials / Inventory
The second category is any materials or supplies that are not in regular use or don’t seem to belong to this process. Red-tag these items as Inventory
Inventory includes excess supplies of material that exceed the need for the next few months, or if throughput is very high, this might be reduced to the next week or just a few days. Red-tag these items as Inventory > Excess. You may need to review your replenishment policy to further control excess inventory.
It also includes materials that are not required or are no longer used. Red-tag these items as Inventory > Redundant
There may be materials that are date-expired or have just been in stock for so long that they are at risk of degraded performance or quality. Red-tag these Items as Inventory > Expired.
You may have other classes of Inventory to red-tag. For example, inventory that belongs to another process or function. This should also be tagged as Inventory > Other and if possible, removed or relocated.
Tools & Small Items of Equipment
This can be the most difficult category to sort objectively. Often, workers are reluctant to part with tools and equipment even if there is no clear need for them.
The red tag process helps by identifying such items as not in immediate or regular use and places them in a nearby red tag area specific to tools.
These usually have a period of expiry after which the item may be disposed of (six months is common), but these items can still be recovered in case of particular need.
If a rare need does arise, the item can be assigned to a special tool storage location away from the workplace.
Large Items of Equipment
Large items of unrequired equipment may not be easily relocated, but the red tag process can identify the unused equipment that remains in the workplace.
Removing large items may require further planning or assistance in relocation. In some cases, the sale of redundant equipment can free up both space and capital, but it may require department and finance approval.
Personal items
These may be clothing or protective equipment, office items, phones or other possessions. Everyone who works in this space should have some personal storage, ideally lockable and depending on the nature of the work, remote from the main workplace.
It is probably best not to use the red tag process on personal items but to negotiate collectively on what is appropriate and how to provide for personal space and storage.
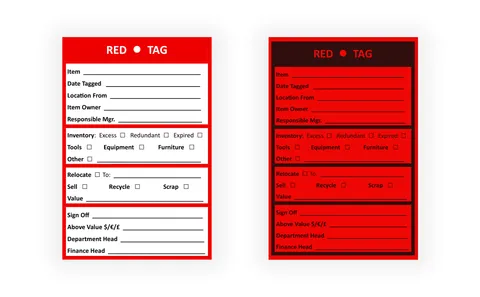
What are 5S Red Tags?
Red tags are used during a 5S workplace initiative to visually distinguish potentially unnecessary items. They should be filled in with information about why the item has been tagged, who the owner is and who is responsible for it.
Red tags should be made of card with a hole punched into them and then attached to an item with a secure tie, such as a knotted string or luggage label tie, or taped to the item if it isn’t possible to tie the tag on.
Portable items that have been tagged, such as small tools, materials and inventory, should be moved to a red tag area for later review and to help the 5S process run as smoothly as possible.
What is 5S?
5S is a popular and well-used strategy for an organised, safe, high-performance workplace. It should help create pride and ownership of the workplace in the team.
It usually follows these steps:
- Sort — Separate what is needed from what isn't
- Set in Order — Reorganise into an efficient and effective place to work
- Shine — Make everything clean, something everyone can take pride in
- Standardise — Maintain the standard of cleanliness and organisation
- Sustain — Monitor performance and invest in teamwork
When are Red Tags Used?
The use of Red Tags is an important part of Sort, the first phase of a 5S project.
Sort is a careful and systematic examination of everything in a workplace. Absolutely every item should be considered: materials, tools and equipment.
What Information Should Go On a Red Tag?
The tag should have a name to identify the owner, the 5S team member who is the user or holder of the item who has agreed to its removal to the red tag area.
This is particularly important for tools and equipment when people may be reluctant to part with items. It is part of the 5S contract that the owner agrees to its temporary removal to the red tag area while the need for it is reviewed. It also shows that the item can be recovered if a specific need arises.
The tag should also have a person identified as responsible whose signature would be required for disposal or reallocation. You may require additional sign-off for the disposal or sale of items above a certain value.
Further classifications may be added to the red tag to help with the decision on what to do next with the item.
Ready-made red tags are available to buy, but it may be preferable to use a layout that is appropriate to your business.
Related Templates
-
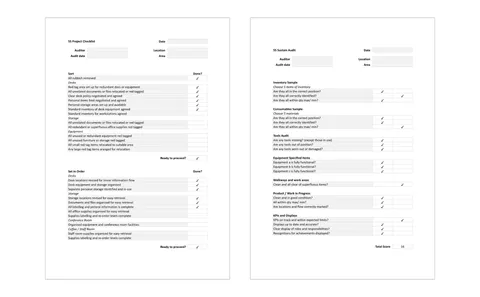
5S Audit Checklist